iOS dev note: There is also an iOS version of Moviper library that we successfully use in production environment, but it’s not yet open-sourced. Stay tuned to not to miss the iOS Moviper!
TL;DR
In this blog post I showcase my Android VIPER library usage. The library is called Moviper. To do so I implement the sample Kotlin Android app using Moviper and RxJava step by step and explain the library specific implementation details. The result of this work is available here. The way I did the app here is only one of available for Moviper uses as it comes with many flavors, applicable in example if you don’t like RxJava or Kotlin. For more - see the Moviper readme.
Introduction
In the previous post I have covered pros and cons and a general idea of the Viper architecture. For now let’s focus on Moviper - the Android Viper library. Moviper comes in many different flavors, there are more and less advanced ones - you can just pick one that fits you the most. In this post I’ll show you the flavor I use in the daily basis on the example of a simple Github login screen. I use Rx flavor with Passive Autoinject Views and I wrap it up using Kotlin language with Android Kotlin Extensions. Sounds scary? Actually, it’s pretty straightforward. Fear not and read on!
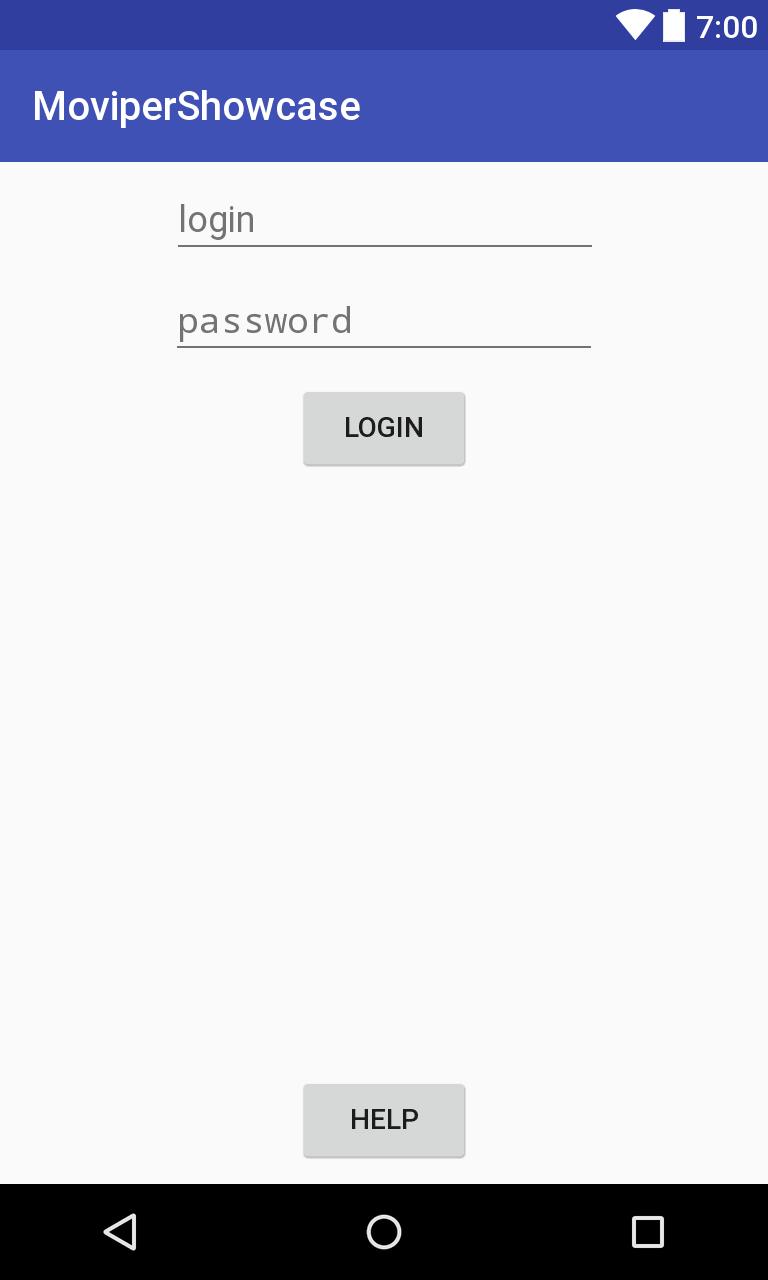
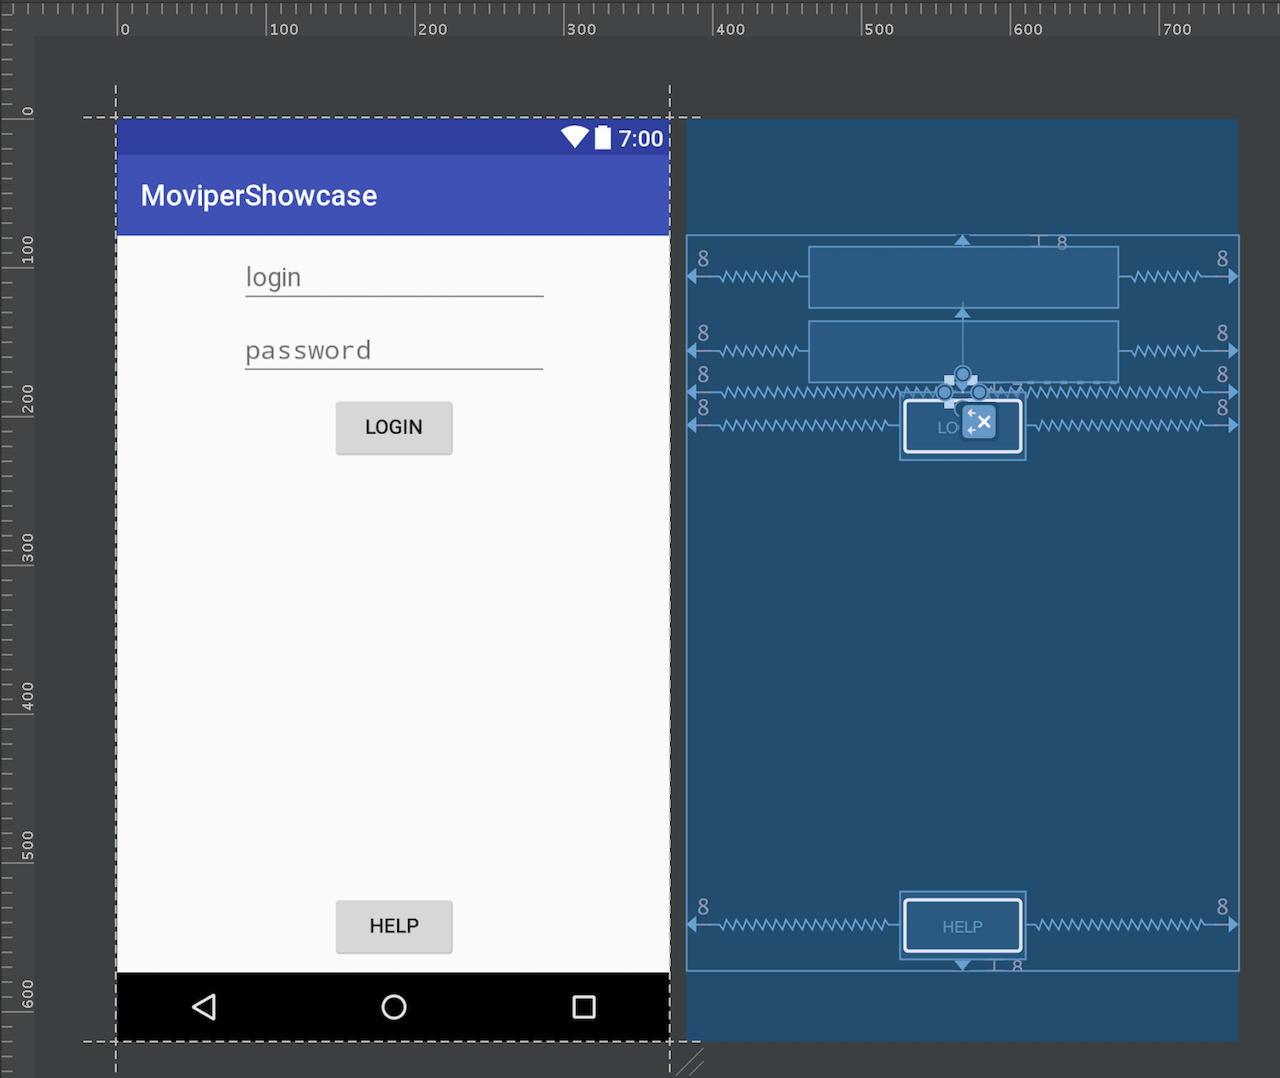
We are going to create a very simple app, that will allow the user to log in to Github and go to the profile page, and provide info about the app.
It will consist of:
- login screen:
- allows user to go to the help screen,
- allows user to login and then leads to profile page.
- fake profile page:
- displays logged in user username.
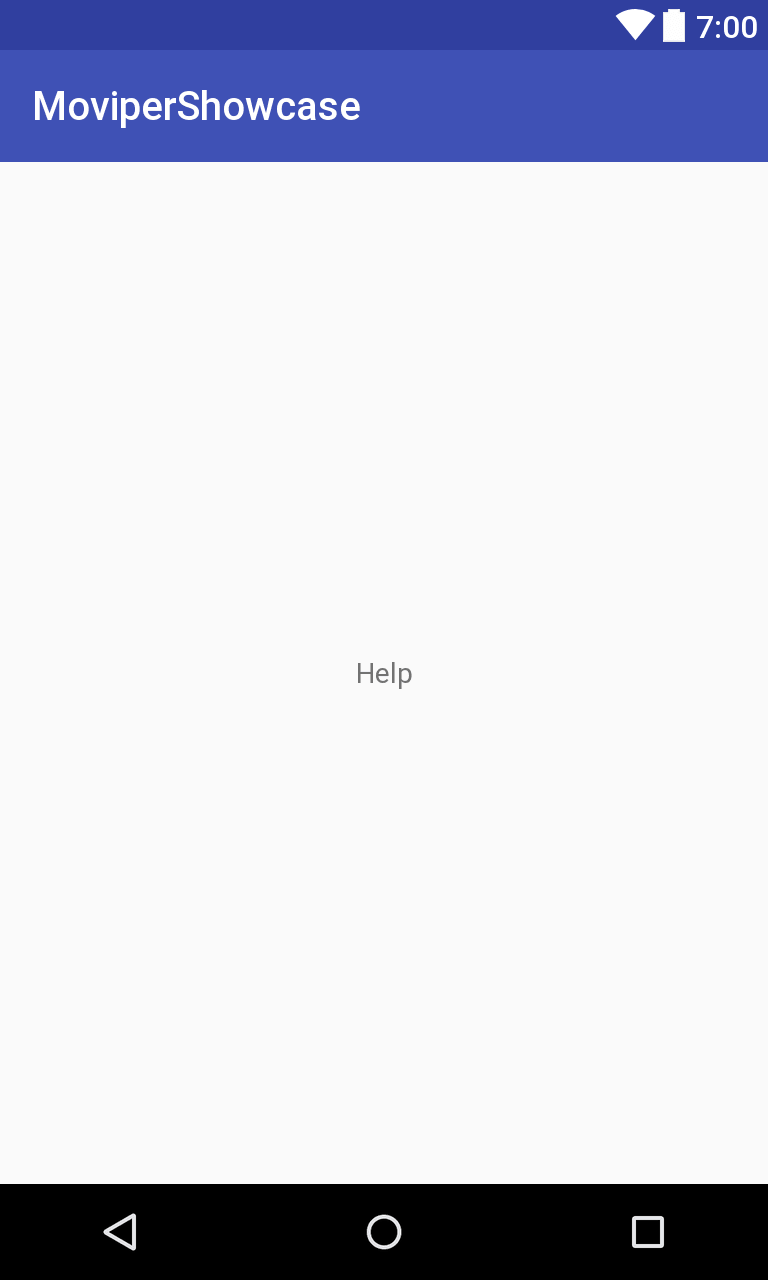
- fake help page:
- displays “help” text.

Ok, enough talking, let’s get our feet wet!
Project setup
Library & generator
First of all, install the Moviper Templates Generator using instructions provided in the repository readme. Just click the link. Remember to restart Android Studio after the installation!
After that, start up with a brand new Android project with no Activity. If you’re new to Android you can follow a official Google tutorial here to learn more about stuff we will discuss here.
The next step is pretty obvious, go to Moviper Github page and find the latest Moviper version and import its Rx-dependency adding the following line to app module gradle dependencies and sync the project.
dependencies {
  compile 'com.mateuszkoslacz.moviper:moviper-rx:2.0.3'
}
First module barebones
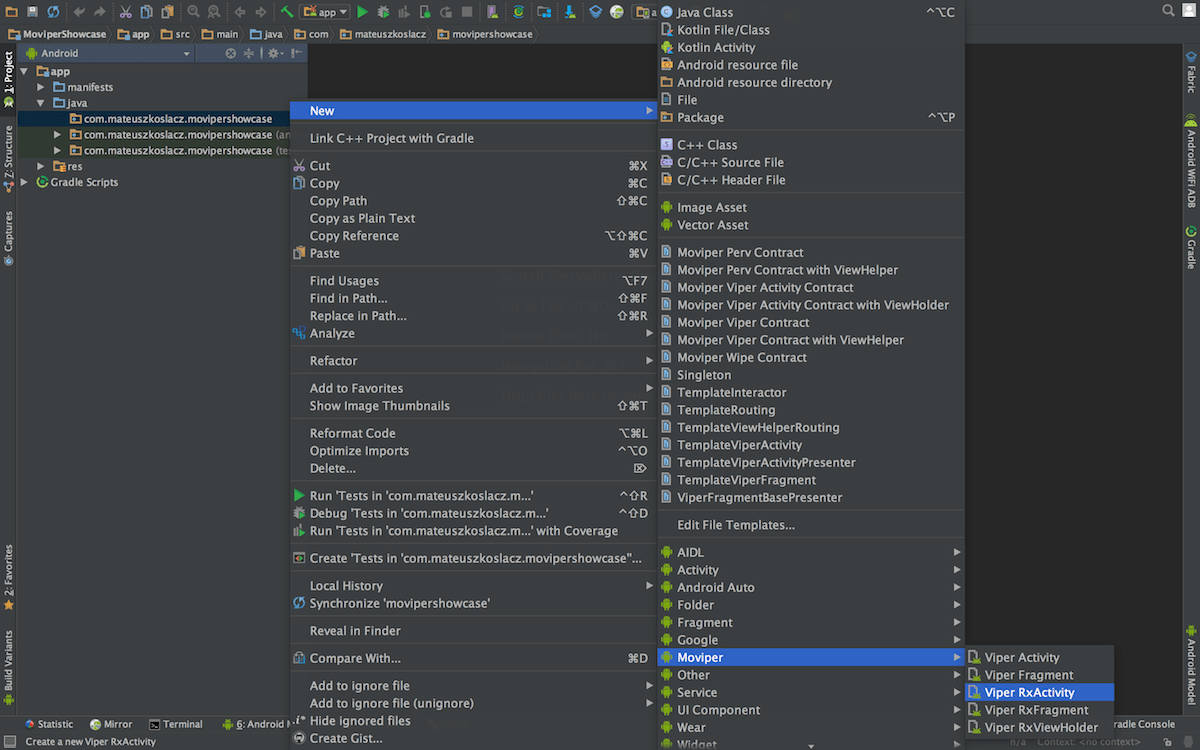
Now things get interesting. Let’s create our first Viper Activity! Right-click the app package and select New -> Moviper -> RxActivity to start the generator.
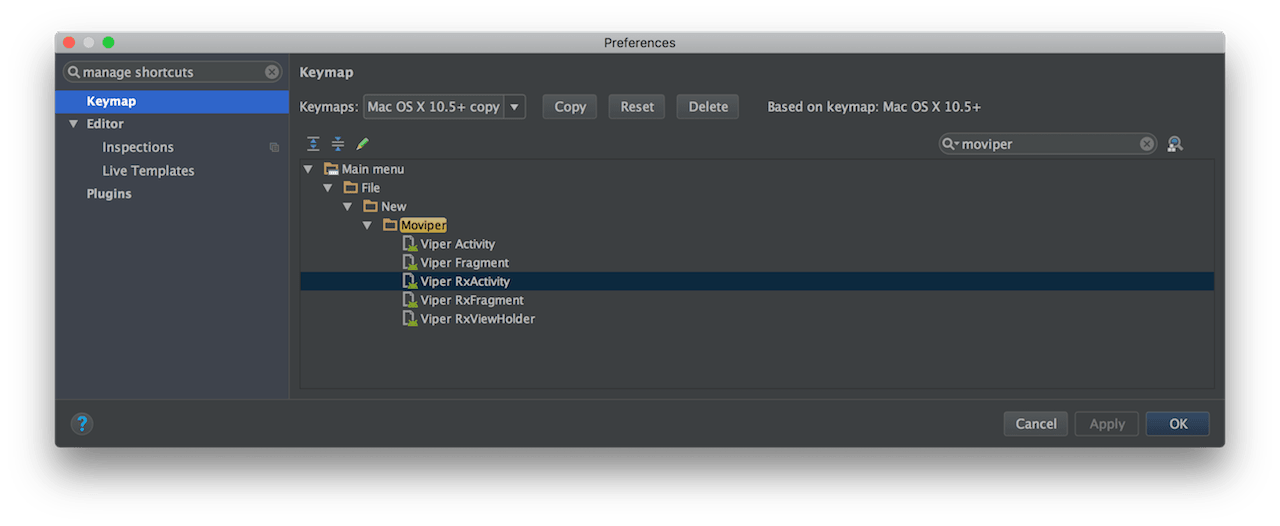
Pro tip: you can even assign a shortcut to create any of the Moviper modules using Manage shortcuts menu (easy to find using our standard cmd/ctrl + shift + A magic), searching for “moviper” actions and right clicking them to add a shortcut. That will be even more smooth using the great Key Promoter plugin, it will suggest a shortcut assignment to the most used actions. You should definitely check it out!
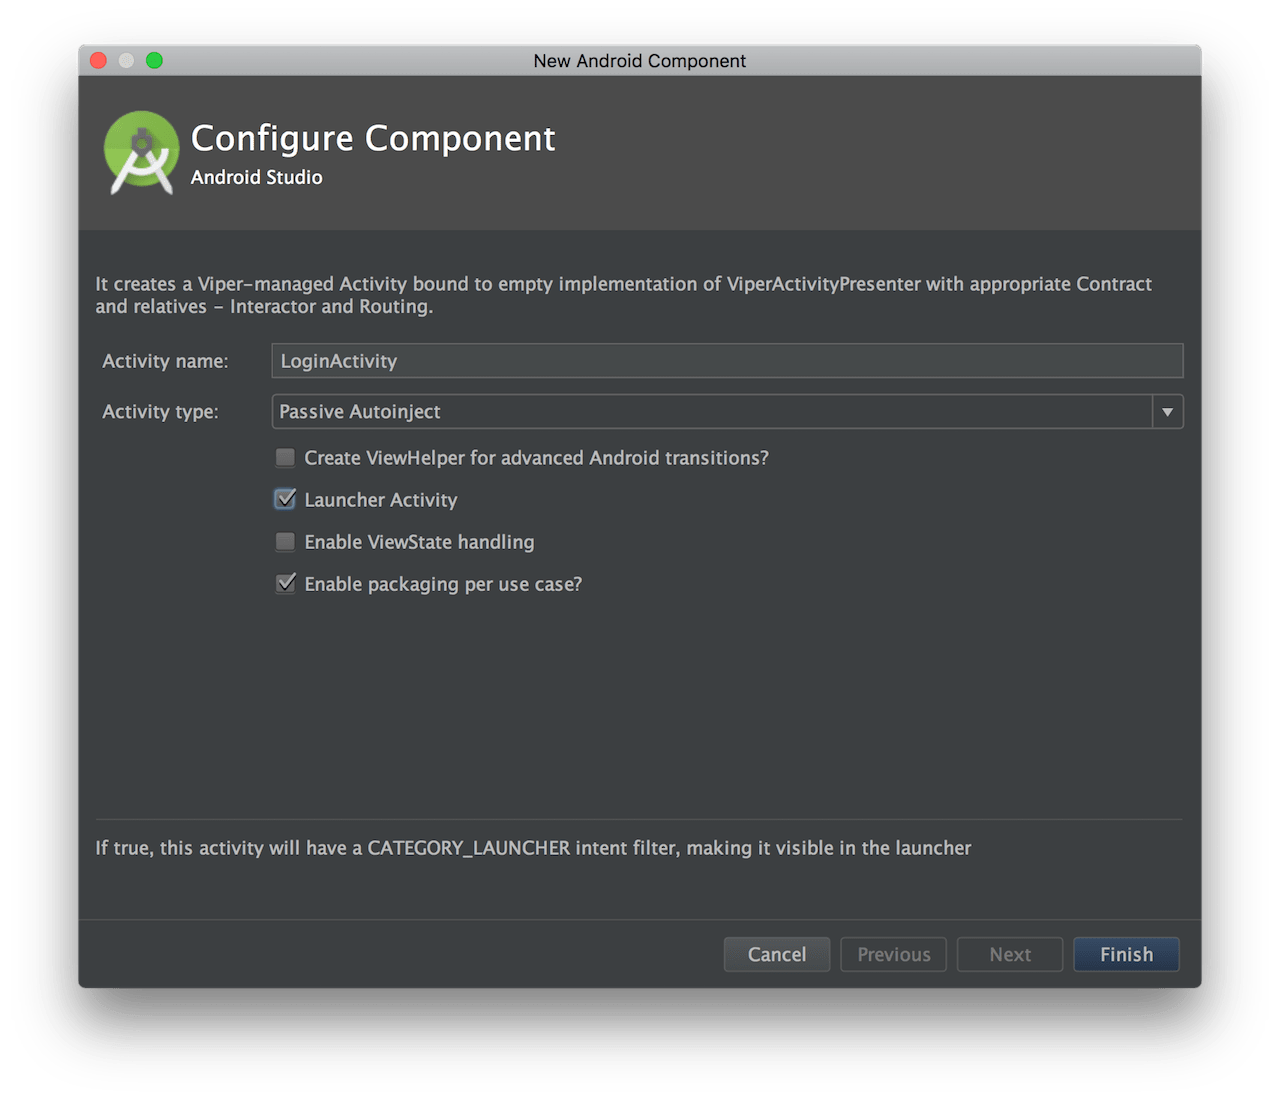
Fill up the form like I did on the screenshot below: name the screen LoginActivity, mark it as a Launcher Activity and select a Passive Autoinject type. There are more options there and I hope that they’re pretty self-explanatory. If not - just trust me for now - I’ll cover them later anyway.
Important! Moviper allows you to handle orientation changes in a very easy way and publish results from background thread after recreating view, but for simplicity, please mark our activity to be in a blocked portrait orientation by adding the android:screenOrientation="portrait" line to its entry in the AndroidManifest.xml file as seen below. Handling orientation changes in Moviper will be covered in the later posts.
<activity android:name=".viper.login.LoginActivity"
        android:screenOrientation="portrait">
    <intent-filter>
        <action android:name="android.intent.action.MAIN"/>

        <category android:name="android.intent.category.LAUNCHER"/>
    </intent-filter>
</activity>
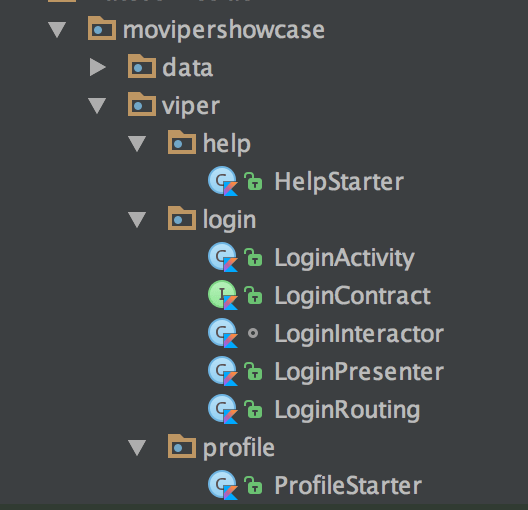
After confirming our choice, we land in the Contract interface. On your left hand side, in the project overview, you can see rest of the classes generated by plugin in *.viper.login package. Viper is a general package for viper modules and the login part was inferred from the name we gave the generated Activity.
But hold on - I told you that we will make a Kotlin app and these files feel somewhat suspicious. Yep, MoviperTemplateGenerator creates only Java file sets and for now there is no plan to migrate them to Kotlin. This way we can use it to generate Java code, and for Kotlin apps, we can convert it to Kotlin easily, so let’s do it right now using magic alt + cmd/ctrl + shift + K shortcut on the entire login package.
If you’re not comfortable with Kotlin, I recommend you to follow the official tutorial. It’s not a big deal, I can guarantee you will get a grasp of it in just few hours ![]() .
.
Login screen module
Responsibilities split
Looking at our module, now we have a set of 5 Kotlin files:
-
LoginActivityclass (the View) -
LoginContractinterface -
LoginInteractorclass -
LoginPresenterclass -
LoginRoutingclass
It’s a good time to stop now and discuss the responsibility distribution over these components. In classical objc-viper we have a following division:
The main parts of VIPER are:
View: displays what it is told to by the Presenter and relays user input back to the Presenter. Interactor: contains the business logic as specified by a use case. Presenter: contains view logic for preparing content for display (as received from the Interactor) and for reacting to user inputs (by requesting new data from the Interactor). Entity: contains basic model objects used by the Interactor. Routing: contains navigation logic for describing which screens are shown in which order.
Source: https://www.objc.io/issues/13-architecture/viper/
For Moviper I have worked out the following, slightly shifted, responsibility fragmentation:
- View: displays what the Presenter wants and relays user input back to the Presenter. (exactly the same as above)
- Interactor: contains the data read/write and preprocessing logic - all of the api and db calls go here.
- Presenter: contains the business logic - reacts to user input, translating it to the Interactor and Routing calls, decides what to display in the View, validates the data in the business use cases sense (ie username can’t be empty).
- Entity: these are data objects that are used in the app business logic, independent from the data handling and view implementation.
- Routing: contains all system-related logic. You can alternatively call it “System”. It manages navigation, screen transitions, notifications scheduling, etc.
Mentioned division allows us to create a modular, testable, clean and neat code. Now we know where to put our stuff, so let’s begin to code!
Contract
The starting point of every screen is a contract. It generally has one purpose - it defines all Viper modules interfaces and entire control and data flow in the given screen. Let’s define methods needed to implement the entire login screen:
interface LoginContract {

    interface View : MvpView {
        val loginClicks: Observable<LoginBundle>
        val helpClicks: Observable<Any>
        fun showLoading()
        fun showError(error: Throwable)
    }

    interface Interactor : ViperRxInteractor {
        fun performLogin(loginBundle: LoginBundle): Single<UserModel>
    }

    interface Routing : ViperRxRouting<Activity> {
        fun goToHelpScreen()
        fun goToProfileScreen(user: UserModel)
        fun finish()
    }
}
I defined here some data classes to describe content we will use in the created methods. LoginBundle data class is used as the Observable event type that will, well, bundle the user login data from View:
data class LoginBundle(val login: String,
                       val password: String)
And there is also a UserModel class that will represent our user retrieved from the remote. It is an equivalent of a Github api JSON returned from the endpoint we will use:
data class UserModel(val login: String,
                     val id: Int)
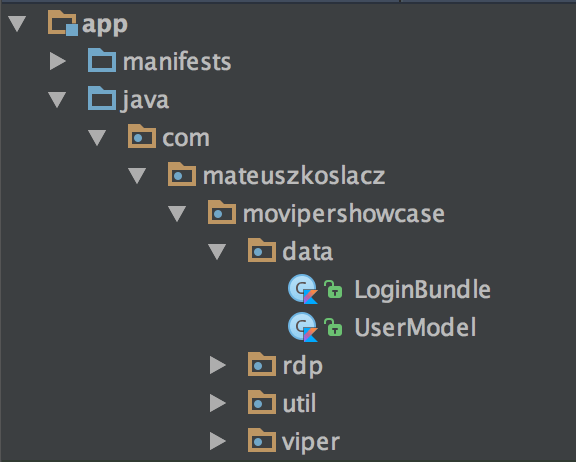
Let’s put them into the data package:
Going back to our contract - as you can see, Presenter has no interface here. Welcome to the passive word from the chosen Moviper flavor. Passive means that View has no idea about Presenter being attached to it. Actually, you can access Presenter from the View using presenter property or getPresenter() method, but in a passive flavor, you will get just plain ViperPresenter, so you won’t have an access to your actual presenter methods. View communicates with Presenter using event streams exposed through View interface to which Presenter subscribes when attaching to it.
Interactor and Routing are, let’s say, Presenters “tools”. Presenter delegates work to them and receives calls results using Observables. That said, there is no component that calls Presenters methods, so there is no need to implement any interface. This allows us to create multiple Presenters (where each has its own Routing and Interactor) for one View and switch between them seamlessly! We’ll go back to this feature later.
Presenter
Ok, so let’s begin implementing the Presenter. Let’s check out what we already have in there.
class LoginPresenter :
        BaseRxPresenter<LoginContract.View,
                LoginContract.Interactor,
                LoginContract.Routing>(),
        ViperPresenter<LoginContract.View> {

    override fun createRouting() = LoginRouting()

    override fun createInteractor() = LoginInteractor()
}
As you can see, there are declarations of Routing and Interactor generated by Generator already. You probably noticed that class declaration is pretty complicated, because of some crazy generic stuff. Don’t worry, after implementing some Viper modules, you will get what happens here, but for now, just trust the force (the Generator, to be more specific).
We’re going to start with defining what should happen in the very beginning of the Presenter lifecycle in Viper module - on a presenter to a view attach. To achieve that, let’s override the attachView(attachingView: LoginContract.View?) method. Don’t forget to call setup to allow Moviper do its setup work. Don’t forget to use view property, not the attachingView argument as a rule of thumb! (the latter is necessary for correct orientation changes handling, we will cover it later, as many other details mentioned here ![]() ).
).
class LoginPresenter :
        BaseRxPresenter<LoginContract.View,
                LoginContract.Interactor,
                LoginContract.Routing>(),
        ViperPresenter<LoginContract.View> {

    override fun attachView(attachingView: LoginContract.View?) {
        super.attachView(attachingView)

        addSubscription(
                view
                        ?.loginClicks
                        ?.doOnNext { view?.showLoading() }
                        ?.observeOn(Schedulers.io())
                        ?.flatMapSingle { interactor.performLogin(it) }
                        ?.observeOn(AndroidSchedulers.mainThread())
                        ?.retrySubscribe(
                                {
                                    routing.goToProfileScreen(it)
                                    routing.finish()
                                },
                                { view?.showError(it) }))


        addSubscription(
                view
                        ?.helpClicks
                        ?.retrySubscribe(
                                { routing.goToHelpScreen() },
                                { view?.showError(it) }))
    }

    override fun createRouting() = LoginRouting()

    override fun createInteractor() = LoginInteractor()
}
As you probably noticed, Presenter has an access to View, Routing and Interactor in an entire class scope. Moreover, it automagically casts them to appropriate interfaces defined in contract.
Note that I always use the optional view call - it’s just easier to do in a no-brainer way. As we often use thread switching in our streams, View can sometimes get detached from the Presenter. Don’t let Android Studio fool you using “unnecessary safe call” message! On the other hand, Interactor and Routing are tightly coupled with Presenter, so there is no need to use safe calls on them in any situation.
Now let’s focus on our app logic. Don’t worry if you spot some methods that are new for you, they’re described later in this post. Here’s the code of our first stream:
addSubscription(
       view
               ?.loginClicks
               ?.doOnNext { view?.showLoading() }
               ?.subscribeOn(Schedulers.io())
               ?.flatMapSingle { interactor.performLogin(it) }
               ?.observeOn(AndroidSchedulers.mainThread())
               ?.retrySubscribe(
                       {
                           routing.goToProfileScreen(it)
                           routing.finish()
                       },
                       { view?.showError(it) }))
Let’s see what happens here, line by line:
-
addSubscriptionis a call that wraps our stream to make sure that there won’t be any memory leak. - We take the stream from
view- see the following line. - It’s a call on the
loginClicksstream provided by our view that is defined in our contract. - We show the loading on the view to notify the user about the processing of the request.
- Here the work shifts to the IO scheduler background thread as a next call will be network based.
- It’s a delegation of the data work to the Interactor using a method that is defined in our contract.
- We switch the thread back to the mainThread as we will touch the UI in the methods below.
- We call our special
retrySubscribeoperator that will allow us to retry the calls in case of failure. - It’s a start of ReactiveX
onNextlambda method. - If the Interactor performed our request succesfully we delegate the screen switch action to the routing using a method that is defined in our contract.
- Same as above - we finish login activity after login.
- There is the end of ReactiveX
onNextlambda method. - Here is ReactiveX
onErrorlambda definition - if the request has failed we show an error to the user.
The second stream based on view?.helpClicks has the similar philosophy, so I won’t cover it step by step as it’s pretty straightforward in the context of the previous stream.
Routing
OK, so our Presenter is ready, now let’s implement the Routing. Let’s start with using Android Studio auto-fix to implement stubbed methods from the contract:
class LoginRouting : BaseRxRouting<Activity>(), LoginContract.Routing {

    override fun goToHelpScreen() {
        TODO("not implemented")
    }

    override fun goToProfileScreen() {
        TODO("not implemented")
    }
}
To start these screens, I will use starters here. Starter is a simple class that is used to, well, start the screens. But why use them instead of just starting the activity here? There are two main reasons for it:
- From the login screen a user is able to move to help screen and profile screen (after login). That’s two screens. As we create Viper modules in our app, if we wanted to create whole modules right now, we would need to add six files (contract, Presenter, Interactor, View, Routing, layout) for each screen and insert appropriate Activity declaration lines to AndroidManifest. Adding 12 files not related with screen we work at won’t be a really good practice.
- If we want to TDD our screen (and we do, I will cover it on the next blog post), it’s much easier to mock the context and check if appropriate starters were called than test if appropriate activities were started. Moreover, it’s much quicker to do it using mocked context than to use Robolectric to test that activities were started.
Let’s create starters for the aforementioned screens and place them in correct packages:
Now let’s use our starters in Routing:
class LoginRouting : BaseRxRouting<Activity>(), LoginContract.Routing {

    private val helpStarter = HelpStarter()
    private val profileStarter = ProfileStarter()

    override fun goToHelpScreen() {
        relatedContext?.let { helpStarter.start(it) }
    }

    override fun goToProfileScreen() {
        relatedContext?.let { profileStarter.start(it) }
    }
}
And a quick look at how the starters look like:
class HelpStarter {

    // it won't work for now as we don't have HelpActivity yet, so for now let's leave this method empty.
    // fun start(context: Context) = context.startActivity(Intent(context, HelpActivity::class.java))
    fun start(context: Context) {}
}
As you can see, I have made them fields of our Routing. You will gain the huge benefit from it in the next post, while we’ll redo the whole process using TDD. For now just trust me please ![]() . Take note of a
. Take note of a relatedContext nullcheck using cool Kotlin safe call and let function.
In Routing, it’s important to always check if the context is attached, because if Presenter calls a routing on the non-main thread, it’s possible that related context provider, ie. Activity, already got destroyed, so it could lead to a crash.
Ok, so now we have implemented the Routing despite that we don’t have any other Viper screen module yet. Nice!
Interactor
Let’s implement the Interactor now, I did it this way:
class LoginInteractor : BaseRxInteractor(), LoginContract.Interactor {

    private val loginRepository = LoginRepository()

    override fun performLogin(loginBundle: LoginBundle) = loginRepository.performLogin(loginBundle)
}
With repository implementation delegated as a quasi Repository design pattern ![]() :
:
class LoginRepository {

    private val retrofit = Retrofit.Builder()
            .baseUrl("https://api.github.com/")
            .addConverterFactory(GsonConverterFactory.create())
            .addCallAdapterFactory(RxJava2CallAdapterFactory.create())
            .build()!! // inferred

    fun performLogin(loginBundle: LoginBundle): Single<UserModel> {
        return retrofit
                .create(LoginAndGetUser::class.java)
                .getUser(loginBundle.authorization)
    }

    private interface LoginAndGetUser {
        @GET("/user")
        fun getUser(@Header("Authorization") authorization: String): Single<UserModel>
    }
}
Where I have extended LoginBundleClass like this:
data class LoginBundle(val login: String,
                       val password: String){

    val authorization = "Basic " + Base64.encodeToString(("$login:$password").toByteArray(), Base64.NO_WRAP)
}
Pro reader note: yep, I know how it looks like, but dude, it’s for presentation purposes.
Well, I don’t want to focus on networking implementation here, it’s over-simplified moreover. I put it to delegate to don’t let it distract you. Just trust me, this code takes the login and password and translates it to the format readable for server authorization. In the regular case we would need to keep the header for the whole session using Interceptors and I personally would abstract-out the network layer implementation from the Interactor using Repository Design Pattern, but it’s the material for another article anyway. The important thing here is that we have our data handling delegated to Interactor.
View
Now let’s dive strictly to my ready view implementation:
class LoginActivity : ViperAiPassiveActivity<LoginContract.View>(), LoginContract.View {

    override val loginClicks by lazy {
        RxView.clicks(loginBtn)
                .map {
                    LoginBundle(login = loginField.text.toString(),
                            password = passwordField.text.toString())
                }!!
    }

    override val helpClicks by lazy { RxView.clicks(helpBtn) }

    override fun showLoading() {
        progressBar.visible()
        loginBtn.gone()
    }

    override fun showError(error: Throwable) {
        progressBar.gone()
        loginBtn.visible()
        Toast.makeText(this, error.localizedMessage, Toast.LENGTH_SHORT).show()
    }

    override fun createPresenter() = LoginPresenter()

    override fun getLayoutId() = R.layout.activity_login
}
As you can see, there is defined Presenter and layout, which was done for us by MoviperTemplatesGenerator. Here you just define the view logic and layout, so you don’t have to worry about any kind of binding to Presenter, handling lifecycle etc. Moviper does it for you.
In this file I have used some cool Kotlin features to reduce boilerplate and make the code more readable. Firstly, there are Kotlin Android Extensions that allows us refer views using their ids directly in the code without declaring them using findViewById() method. You can see that I reference progressBar, loginBtn etc. directly, without any lookup and it works.
The second thing is the use of Extension Functions that I use to neatly change the visibility of the views, ie progresBar.visible(). I put view extensions to the separate file in the *.utils package:
com.mateuszkoslacz.movipershowcase.util.ViewExtensions.kt
fun View.visible() {
    this.visibility = View.VISIBLE
}

fun View.gone() {
    this.visibility = View.GONE
}
The third thing is a usage of Kotlin lazy function that allows us to initialize values that uses Android Views inside the class body, before views initialization, instead of onCreate method. Kotlin is sweet!
I’ve also used Jake Wharton’s RxBinding to easily create Rx streams from buttons.
Don’t forget about the corresponding layout file. I won’t include it here, but you can check it out in the repo.
As you can see, our view implementation is pretty straightforward. We show and hide appropriate views, show an error in the toast, and provide click streams - in case of login clicks, we map it to the LoginBundle using texts from inputs.
Following Views Modules
Our login screen is fully functional right now, but before launching it, let’s pretend that our sprint has just finished and we have to implement the next screens. Let’s check out how it will influence our previous module (hint: it won’t).
Let’s create (and of course declare in AndroidManifest.xml) our HelpActivity that we’re prepared to launch as we have created a starter for it before. It’s not created as a Moviper Activity for simplicity, but it should be ![]() :
:
class HelpActivity : AppCompatActivity() {

    override fun onCreate(savedInstanceState: Bundle?) {
        super.onCreate(savedInstanceState)
        setContentView(R.layout.activity_help)
    }
}
And now we can uncomment the code we wrote before in our starter:
class HelpStarter {

    fun start(context: Context) = context.startActivity(Intent(context, HelpActivity::class.java))
}
What are the changes in the Login Viper code? None. The only difference is that our help button just started to work. In Login Viper, what will be the overhead of an existence of a help screen in our code if we decide to disable the help button using some remote config? Almost none (a one-liner HelpStarter class object created in Routing).
Moreover, we could remotely swap the starter to another one existing in our code to remotely modify the behavior of the app. Viper allows a very high modularity of apps in the level that allows to reconfigure the app on the fly. It’s very helpful in handling special events (ie. special Christmas modules that can be activated and deactivated without an app update) or some fatal scenarios in which some module malfunctions - we can always disable it remotely to avoid further crashes during the hotfixing. More detailed article about this feature coming soon.
Now let’s focus on the ProfileActivity, and once again, we’re prepared to launch it as we have created a starter for it before. And once again, it’s not created as a Moviper Activity for simplicity, but it should be ![]() :
:
const val EXTRA_USERNAME_STRING = "EXTRA_USERNAME_STRING"

class ProfileStarter {

    fun start(context: Context, user: UserModel) {
        val starter = Intent(context, ProfileActivity::class.java)
        starter.putExtra(EXTRA_USERNAME_STRING, user.login)
        context.startActivity(starter)
    }

}
class ProfileActivity : AppCompatActivity() {

    override fun onCreate(savedInstanceState: Bundle?) {
        super.onCreate(savedInstanceState)
        setContentView(R.layout.activity_profile)
        usernameText.text = intent.getStringExtra(EXTRA_USERNAME_STRING) // display the username
    }
}
And once more, no changes in Login Viper code. The only difference is that we proceed to the ProfileScreen after a successful login.
Implementation finish
Now our app is complete. We can put the wrong credentials to our inputs and see the error and then retry with correct ones and succeed. We can try to login with network disabled and then retry after enabling. We can see that our progress bar shows while loading and disappears after the error and our LoginActivity finishes after successful login. The help view is also functional. It’s alive!
It looks like we have finished our base example of Moviper-rx with Passive Autoinject Views flavor in Kotlin. Of course, if you prefer Java you can use it as well, even better using some Moviper flavor that will replace Kotlin Android Extensions for you, ie. Butterknife or Databinding one. Just check out the samples of their usage in a Moviper repo.
Moreover, if you don’t like the passive view concept you can choose the flavor in which view is not passive and it calls presenters methods or you can even pick the non-rx Moviper version. Feel free to choose your favorite! (but take note that I consider the flavor described in this post as a most boilerplate-reducing, readable, scalable and featureful) Just check out the repo.
But it’s not the end yet. As you probably noticed, in this example I used some methods probably unknown to you and you may be wondering how our app will behave in edge cases. Don’t worry, just read on!
Implementation & behavior details
For simplicity, I have skipped some more detailed descriptions of utils I used, behavior of our app and rules to follow when using Moviper. Let’s go back there and be more meticulous about them.
retrySubscribe operator
I defined our special retrySubscribe operator in ObservableExtensions.kt file in *.util package:
fun <T> Observable<T>.retrySubscribe(onNext: (T) -> Unit,
                                     onError: (Throwable) -> Unit) =
        this.doOnNext(onNext)
                .doOnError(onError)
                .retry()
                .subscribe()!!
This operator allows our streams to signal an error and not to unsubscribe after that - if user wants to log in and he’s out of the Internet, he will get some error about it and we want to allow him to retry this action. That’s why we use the retrySubscribe operator. I’ll describe implementation details in another post.
addSubscription operator
In the example you can see that each stream is wrapped in a addSubscription call. It’s one of the built-in Moviper methods that allows you to forget about the need of unsubscribing your streams to avoid memory leaks. Just wrap all of your never completing streams using addSubscription and that’s all! Your streams will be unsubscribed at Presenter detach from View. If you have some objects in your Presenter that need some special finishing, do it overriding onDetach(Boolean retainInstance) method (and once again, don’t forget to call super!).
Presenter lifecycle & retaining
Using onDetach is pretty simple, but remember, not every call to it means that Presenter will be destroyed - if a retainInstance argument is true, it means that attached view is destroyed, because of the Android orientation change and Presenter will be retained and reattached to the new view, so you don’t have to nuke your delegates (at least those which don’t use the view reference).
The thing worth emphasizing here is that your Presenter won’t be parceled and recreated or something like that. After rotating the screen, it will be the same exact presenter that have been attached to the view before orientation change. Moreover, all of the background work that the presenter performs (and all of its children, with Routing and Interactor as a most notable examples of them) will be delivered to the eventual view, when the orientation change happens in the meantime, if you follow only one rule of thumb - always communicate with the view using the main thread (as it is in Mosby library - Can the Presenter and its view be out of sync during a screen orientation change? paragraph. Moviper bases on Mosby so the linked rule refers to Moviper also).
Presenter-View communication thread
As I said above: always communicate with the view using the main thread. Even if view will need to perform some hard work on the background thread, using the diffUtil for example - always call the view on the main thread and delegate the work to another thread in the view itself. It will allow your sub-modules to always be synchronized. For more info about the Presenter and view lifecycle and behavior I recommend you reading the Mosby docs and blog as the Moviper is built on top of this library, so it inherits the behavior of view-presenter relations.
Independent implementation
The other fancy thing, even though we haven’t even touched another components, is that we could safely implement entire presenter! (and then Routing etc.) Using Moviper you can parallelize the work on the single module among entire team. Making work more focused on a single screen makes you send new builds to QA faster, so there is no bottlenecking on the very end of the scrum sprint!
Flavor design
It’s worth noting that in our app View is 100% passive - it means that View is not aware of any kind of Presenter attached to it nor methods it has. View doesn’t call Presenter in any way - it just provides the interface to which a Presenter can attach itself to. It’s the Presenter that decides what to do, what to use and what not to use - View has no app logic inside. That’s why the views flavor I use in this post has Passive in its name.
View is passive, but it provides the Rx streams to which Presenter can attach itself to. That’s why the Moviper flavor here has Rx in its name.
If we had some special views that would need additional setup we could do it overriding injectViews(android.view.View). There’s no need to plug in to android lifecycle methods like onCreate etc., Moviper does the job for us. That’s why the views flavor I use in this post has Autoinject in its name.
I guess that now you get the naming of this Moviper-rx with Autoinject Passive Views flavor ![]() .
.
Possibilities
As you can see, our app is really neat and clean. The clean design makes our apps maintainable, but it also comes in handy in our production environment where we attach multiple Presenters to our Views using Moviper ViperPresentersList. In Movibe/Wirtualna Polska we have a separate business logic presenter, analytics presenter, advertising presenter, etc., where every presenter has its own routing and interactor crafted appropriately to the role of a given presenter. The fact that there are many presenters is transparent for the view. It allows us to dynamically attach or detach presenters to, for example, turn off ads for premium users.
Moreover, if your presenter has grown too much and for some reason you can’t split your view to smaller chunks that corresponds with separate use-cases, you can create the presenter for each use-case and attach the whole bunch of them to the single view. It allows us to keep our classes small, and in most cases, smaller means more readable, more maintainable, more testable and more awesome. And still - with no changes in the View!
It also works for defining multiple behaviors for one view. We use it to create one login screen and reuse it in the various login methods as we allow authorization using some external account credentials in our apps. Moviper provides a ready-to-use tool for it called PresentersDispatcher.
The idea works in both ways - we also swap the views using the same presenter and whole app logic. For example, we do so when we implement the Android TV version of our apps using the goodies from Leanback Library.
For more general overview of VIPER features I recommend you reading my previous article.
Sum up
To sum up let’s look at our code.
- It’s highly modular in a way that allows us to remotely enable, disable and swap modules and develop multiple screens and modules at once without conflicts.
- The contract allows a dev to take a quick overview how the entire module works while each submodule is so simple and beautiful that it’s understandable at a glance.
- The view is passive, so we can swap the presenters, split the presenter to multiple ones if it grows too much or attach additional presenters for optional features.
- We wrapped all our logic in Rx streams, which allows us to track the app execution path easily and making it almost completely crash-safe (not to be confused with being error-safe).
And there is a MoviperTemplatesGenerator that did all the relations binding, class creating and inheritance defining for us! That’s a pretty nice bunch of features!
In this post series I have skipped some less important code, but you can check out and run the whole sample here.
I encourage you to let me know what you think about the architecture and the library itself. Feel free to contribute and report the issues.
Last but not least, stay tuned as I’ll be posting more about the Moviper goodies:
- handling orientation changes with retaining background jobs state,
- Inter-Presenter-Communication,
- dispatching presenters on runtime (using the same view with different presenters),
- using multiple presenters with one view,
- creating the viper modules for RecyclerView cells,
- creating Android Service based viper modules and standalone viper modules,
- passing Intent extras to presenters,
- TDDing Viper modules,
- using Moviper Test utils,
- using iOS Moviper Version,
- sharing code between Android and iOS thanks to Moviper.
And much more, stay tuned!
Great thanks to Damian Chodorek and Paweł Gawenda for reviewing this post.

Leave a Comment